Z-Line Designs TV Stand Assembly: A Comprehensive Guide
Navigating the assembly process begins with locating the correct PDF instructions. BrandsMart USA and Walmart.com offer Z-Line products, but
the official documentation is crucial for a successful build, avoiding potential issues;
Understanding Z-Line Designs & Product Range
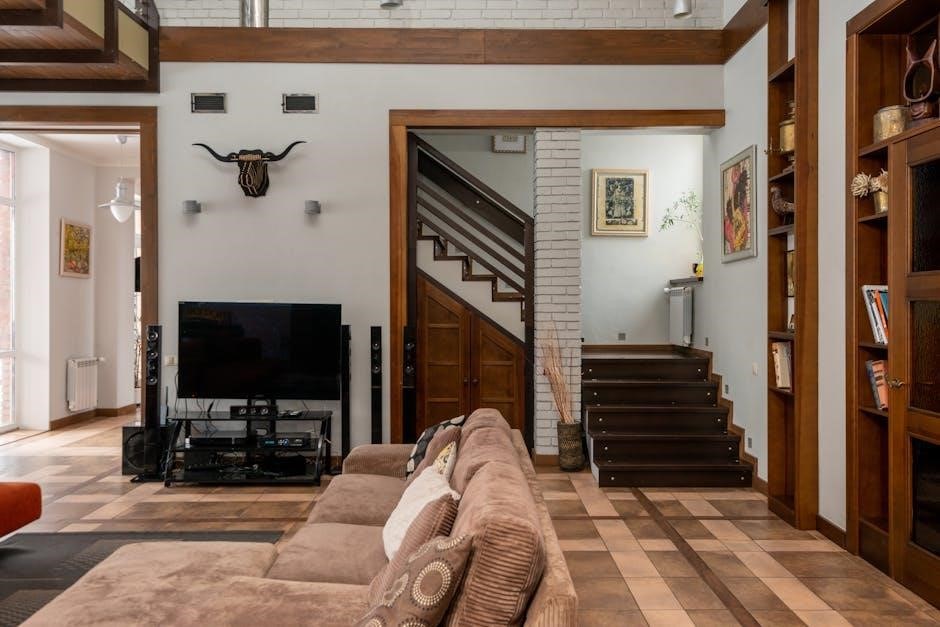
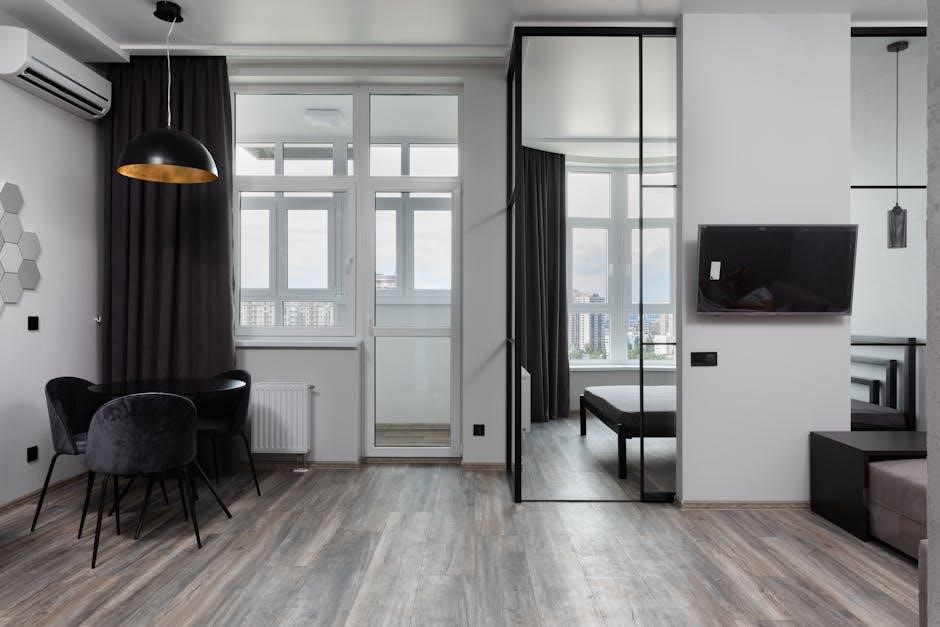
Z-Line Designs specializes in contemporary TV stands and entertainment centers, often featuring glass and metal construction. Their product range is quite diverse, encompassing floor-standing units like the Phantom series available at Walmart, and 3-in-1 consoles such as the Baltic model (ZL950260M29U) sold at BrandsMart USA.
These stands aren’t simply furniture; they integrate TV mounting capabilities, streamlining home entertainment setups. Understanding this core design philosophy is key. The Baltic model, for example, offers a flat panel mount, while the Phantom system is a complete mounting solution.
Crucially, each model requires specific assembly instructions. While a universal approach might seem tempting, Z-Line’s varied designs necessitate referencing the correct PDF documentation. Attempting assembly without the proper guide, as highlighted by one online video, can lead to frustration and potential damage. Therefore, identifying your exact model is the first step before seeking the corresponding assembly PDF.
Identifying Your Specific Z-Line TV Stand Model
Accurately identifying your Z-Line TV stand model is paramount before attempting assembly. The Baltic 3-in-1 TV Mount Console, designated ZL950260M29U and available at BrandsMart USA, requires a different instruction set than the Phantom Flat Panel System sold at Walmart.
Locate the model number on the original packaging, the product invoice, or a sticker affixed to the stand itself. This alphanumeric code is your key to finding the correct assembly PDF. Don’t assume all Z-Line stands are assembled identically; their diverse designs demand specific guidance.
Without the correct model number, locating the appropriate PDF becomes significantly harder. Generic instructions are unlikely to cover all the nuances of your particular stand. Remember, a user online cautioned against following potentially incorrect assembly videos, emphasizing the risk of damage. Prioritize accurate model identification to ensure a smooth and successful assembly process.
Locating the Assembly Instructions PDF
Finding the correct PDF assembly instructions is the first critical step. While retailers like BrandsMart USA and Walmart.com sell Z-Line Designs products, they don’t always directly provide the PDF. Begin your search on the official Z-Line Designs website – typically within their ‘Support’ or ‘Downloads’ section.
Use your identified model number (e.g., ZL950260M29U for the Baltic console) as the search term. A targeted search yields faster, more accurate results. If the official website fails, try a broader web search using the model number and “assembly instructions PDF”.
Be cautious of unofficial sources; always verify the PDF originates from a reputable site. A user’s warning about “epically useless” videos highlights the importance of reliable documentation. A correct PDF will detail each step, ensuring a safe and structurally sound assembly. Prioritize official sources for accurate guidance.
Common Tools Required for Assembly
Successfully assembling your Z-Line Designs TV stand necessitates a few essential tools. While the specific requirements vary by model, a Phillips head screwdriver is universally needed. A flathead screwdriver may also be required for certain adjustments or securing components.
Often, an Allen wrench (hex key) is included with the hardware, but having a set on hand provides versatility. A rubber mallet can assist with gently tapping pieces into place without causing damage. Power drills with screwdriver bits can expedite the process, but use caution to avoid over-tightening.
Referencing the assembly instructions PDF is crucial to confirm the exact tools needed for your specific model. A video demonstrating universal TV stand assembly suggests basic home repair tools are sufficient, but the PDF will detail any specialized requirements. Ensure you have all tools prepared before beginning to streamline the build.
Step-by-Step Assembly Process ─ Base Construction
Initiating the assembly, as detailed in the Z-Line Designs instructions PDF, typically begins with base construction. This usually involves connecting the side support panels to the baseboard using provided screws and dowels. Carefully align the panels, ensuring proper orientation as indicated in the diagrams within the PDF.
The instructions will specify the screw type and placement for each connection point. Avoid over-tightening initially; a snug fit is preferable, allowing for adjustments later. Some models may include additional support beams for the base, which should be attached at this stage.
Consult the PDF frequently during this phase, as variations exist between models like the Baltic (ZL950260M29U) and Phantom systems. A stable base is fundamental; double-check all connections before proceeding to the next assembly step, ensuring a solid foundation for your TV stand.
Attaching the Side Panels
Following the Z-Line Designs assembly PDF, attaching the side panels requires precision. Typically, this involves aligning the pre-drilled holes in the side panels with those in the assembled base. The PDF will illustrate the correct orientation – often, one side panel is designated as left and the other as right.
Utilize the screws provided, ensuring they are the correct size and type as specified in the instructions. Again, avoid over-tightening at first; allow for minor adjustments. Some models, like the Phantom system, may have specific locking mechanisms or cam locks that need to be engaged during this step.
Refer to the PDF diagrams frequently to confirm proper alignment and screw placement. A wobbly structure indicates an issue with this stage. Once both side panels are securely attached, the main frame of the TV stand begins to take shape, providing support for subsequent components.
Installing the Shelves
The Z-Line Designs assembly PDF will detail shelf installation, varying by model. Generally, shelves slot into pre-drilled holes or rest upon shelf supports secured to the side panels. The Baltic 3-in-1 console, for example, may utilize adjustable shelf heights, offering customization.
Ensure the shelf supports are firmly attached before placing the shelves. Again, consult the PDF for the correct screw type and avoid over-tightening. Some shelves might have a specific weight capacity, so distribute items evenly to prevent sagging or instability.
Pay close attention to the orientation of the shelves; some may have a finished side that should face forward. The PDF diagrams are invaluable here. Properly installed shelves enhance the functionality and aesthetic appeal of the TV stand, providing storage for media devices and accessories.
Mounting Bracket Installation ─ Preparation
Before securing the mounting bracket, the Z-Line Designs PDF emphasizes careful preparation. This involves identifying the correct bracket components and verifying they match your TV’s VESA pattern (detailed later in the instructions). The Phantom Flat Panel System, for instance, requires specific hardware for attachment.
Lay out all bracket parts and familiarize yourself with their function. The PDF will illustrate the bracket’s orientation on the TV stand’s top panel. Ensure the stand is on a protected surface to prevent scratches during installation.
Crucially, the PDF will highlight the importance of pre-drilling pilot holes, if necessary, to facilitate screw insertion and prevent wood splitting. Double-check alignment before proceeding, as adjustments can be difficult once screws are tightened. Proper preparation ensures a secure and stable TV mounting solution.
Mounting Bracket Installation ⸺ Securing to Stand
The Z-Line Designs PDF provides detailed guidance on securing the mounting bracket to the TV stand. It stresses using the correct screws – often included in the hardware pack – to avoid damaging the stand’s material. For models like the Baltic 3-in-1 (ZL950260M29U), the PDF will illustrate precise screw placement points.
Begin by aligning the bracket with the pre-drilled holes (or pilot holes you’ve created). Apply even pressure while inserting the screws, tightening them gradually in a criss-cross pattern. This ensures uniform distribution of force and prevents warping. The PDF cautions against over-tightening, which could strip the screw holes.
Regularly check alignment throughout the process, referencing the diagrams in the PDF. A securely fastened bracket is paramount for TV stability and safety. A video (though described as “epically useless”) might visually demonstrate this step.
TV Mounting Considerations ⸺ VESA Compatibility
The Z-Line Designs assembly PDF emphasizes the importance of VESA compatibility. VESA (Video Electronics Standards Association) defines the standardized mounting interface on the back of TVs. Before proceeding, you must determine your TV’s VESA pattern, as detailed in the documentation.
The PDF will likely include a chart illustrating common VESA patterns (e.g., 200x200mm, 400x400mm). Z-Line stands, like the Phantom Flat Panel System, support a range of VESA sizes, but exceeding the specified limits can compromise stability.
Incorrect VESA compatibility can lead to improper mounting and potential damage to both the TV and the stand. The PDF will guide you in selecting the correct screws and spacers to ensure a flush and secure fit. Always double-check these specifications before attaching the TV.
Determining Your TV’s VESA Pattern
The Z-Line Designs assembly PDF provides guidance on identifying your TV’s VESA pattern. This crucial step ensures compatibility with the mounting bracket. Typically, the VESA pattern is a square or rectangle defined by the distance (in millimeters) between the mounting holes on the back of your television.
The PDF instructs users to measure horizontally and vertically between these mounting holes. This measurement (e.g., 200x200mm, 400x400mm) is your TV’s VESA pattern. Many manufacturers also list this information in the TV’s user manual or on their website.
Carefully consult the Z-Line stand’s specifications within the PDF to confirm it supports your TV’s VESA pattern. Using incorrect screws or attempting to force a non-compatible TV onto the mount can cause damage. Accurate measurement is paramount for a safe and secure installation.
Attaching the TV to the Mounting Bracket
The Z-Line Designs assembly PDF details the precise steps for securely attaching your TV to the mounting bracket. It emphasizes using the correct screws – often included with the stand – that match your TV’s VESA pattern and thread size. Do not overtighten, as this can damage the TV or the bracket.
The PDF typically illustrates how to align the bracket with the mounting holes on the back of the TV, ensuring a flush and stable connection. It may recommend having a second person assist with this step, especially for larger televisions.
Carefully follow the PDF’s instructions regarding washers and spacers, if applicable, to ensure proper clearance and prevent scratching. Once the screws are in place, double-check their tightness before proceeding. A secure attachment is vital for safety and preventing accidental falls.
Cable Management Solutions within the Z-Line Stand
The Z-Line Designs assembly PDF highlights integrated cable management features designed to conceal wires and maintain a clean aesthetic. These often include pre-cut openings in the back panel, allowing cables to pass through to power outlets. The PDF will illustrate the optimal routing paths to minimize visible clutter.
Many Z-Line stands feature channels or clips within the stand’s structure to further organize and secure cables. The instructions will demonstrate how to utilize these features effectively. Proper cable management isn’t just about appearance; it also improves airflow and prevents accidental disconnections.
The PDF may suggest using cable ties or sleeves (not always included) for additional organization. It’s crucial to avoid overfilling the cable management areas, as this can restrict airflow and potentially damage the cables. A tidy setup enhances both functionality and the overall look of your entertainment center.
Safety Precautions During Assembly
The Z-Line Designs assembly PDF emphasizes prioritizing safety throughout the build process. Always work in a spacious, well-lit area, free from obstructions to prevent trips and falls. The PDF will likely advise using work gloves to protect your hands from sharp edges and splinters during handling of components.
It’s crucial to follow the instructions carefully and avoid forcing parts together. Incorrect assembly can compromise the stand’s stability and pose a safety hazard. The PDF may warn against over-tightening screws, which can strip threads or damage the materials. Use the appropriate tools as recommended.

If lifting heavier components, seek assistance to prevent strain or injury. Ensure the stand is placed on a level surface before mounting your TV. The PDF will likely include a warning about the potential for tipping if the stand is overloaded or unstable. Prioritize a secure and safe installation.
Troubleshooting Common Assembly Issues
The Z-Line Designs assembly PDF often anticipates common hurdles during construction. A frequent issue is misaligned holes; the PDF suggests loosening adjacent screws to allow for adjustment. Difficulty attaching side panels can often be resolved by ensuring the base is perfectly square, as detailed in the instructions.
If encountering problems with the mounting bracket, double-check the VESA compatibility with your TV, referencing the PDF’s guidance. Stripped screw holes are addressed by using slightly larger screws or wood glue with toothpicks, as a temporary fix. The PDF may also offer solutions for cable management challenges.
Remember the cautionary tale from online videos – avoid forcing anything! If a step seems impossible, revisit the instructions and diagrams; The Z-Line Designs PDF is your primary resource for resolving these issues, preventing frustration and ensuring a stable, safe setup.
Dealing with Missing Parts
The Z-Line Designs assembly PDF includes a comprehensive parts list, essential for identifying any missing components immediately. If a part is absent, do not proceed with assembly; attempting to substitute can compromise structural integrity. The PDF often directs you to Z-Line Designs’ customer support for replacements.
Before contacting support, carefully re-examine the packaging materials – smaller parts are sometimes concealed within. Document the missing part number from the PDF and have your purchase information readily available. Z-Line Designs’ warranty information (detailed elsewhere) typically covers missing parts.
BrandsMart USA and Walmart.com, as retailers, may also offer assistance, but contacting Z-Line directly is usually the most efficient route. Avoid using non-original parts, as they may not fit correctly or meet safety standards. The PDF serves as proof of purchase and a guide for requesting the correct replacement.
Understanding Z-Line Designs Warranty Information
The Z-Line Designs TV stand assembly PDF often contains a brief overview of the warranty, but a complete understanding requires reviewing the official warranty document, typically available on their website. This document details coverage periods for different components, varying based on the specific Z-Line model – like the Baltic 3-in-1 (ZL950260M29U) or Phantom system.
Warranty coverage generally protects against manufacturing defects, not damage caused by improper assembly. Therefore, meticulous adherence to the PDF’s instructions is crucial. Keep your purchase receipt as proof of date; it’s essential for any warranty claim.
The warranty may not cover normal wear and tear or damage resulting from misuse. BrandsMart USA and Walmart.com may offer extended warranties, but these are separate from Z-Line’s standard coverage. Carefully read the terms and conditions before making a claim, referencing the PDF for part identification if needed.
Z-Line Designs Baltic 3-in-1 TV Mount Console (ZL950260M29U) Specifics
The ZL950260M29U Baltic model’s assembly PDF is particularly detailed, given its 3-in-1 functionality – console, mount, and shelving. Pay close attention to diagrams illustrating the base construction, as this forms the foundation for the entire unit. BrandsMart USA highlights this model’s capacity for TVs up to 72 inches, but the PDF specifies weight limits that must be observed.
The PDF will guide you through attaching the side panels and installing the shelves, emphasizing proper alignment. Mounting bracket installation is a multi-step process, requiring careful attention to VESA compatibility (discussed elsewhere in the guide). The Baltic’s cable management system is a key feature; the PDF demonstrates how to utilize the integrated channels effectively.

Review the parts list in the PDF before starting to ensure all components are present. The console’s glass components require extra care during assembly, as noted in the instructions.
Z-Line Designs Phantom Flat Panel System ⸺ Specifics
The Phantom Flat Panel System’s assembly PDF focuses on its floor-standing design, differing from the Baltic’s console base. Walmart.com lists this system for TVs ranging from 60 inches, and the PDF details specific weight capacity limitations for safe operation. The instructions emphasize the importance of securing the mounting bracket to both the stand and the TV, utilizing appropriate hardware.
The PDF provides clear diagrams for assembling the stand’s frame, highlighting the connection points for the glass components. Cable management is addressed, though the Phantom system may offer fewer integrated channels compared to the Baltic model. Pay close attention to the VESA compatibility section within the PDF, ensuring your TV’s mounting pattern aligns with the bracket.
The instructions include a troubleshooting section addressing common assembly issues. Carefully review the safety precautions outlined in the PDF before beginning the build.
Alternative Assembly Resources (Videos & Forums)
While the official Z-Line Designs PDF is paramount, supplementary resources can prove invaluable. A YouTube search reveals videos attempting to guide assembly, though one disclaimer explicitly states it’s “epically useless” and warns against following along. Exercise caution when using unofficial video guides, verifying information against the official PDF.
Online forums dedicated to home entertainment and furniture assembly often host threads discussing Z-Line stands. These forums can provide insights into common challenges and solutions encountered by other users. Searching for your specific model number (e.g., ZL950260M29U for the Baltic) will yield more relevant results.
Remember that forum advice should be critically evaluated. Always prioritize the instructions within the official Z-Line Designs PDF to ensure a safe and correct assembly. These resources are best used to clarify specific points, not as a replacement for the official documentation.
Post-Assembly Inspection & Stability Check
Following the Z-Line Designs TV stand assembly instructions PDF, a thorough inspection is critical. Begin by verifying all screws and bolts are securely tightened, referencing the parts list within the PDF to ensure nothing is missing. Do not overtighten, as this can damage the materials.

Next, assess the overall stability of the stand. Gently rock it from side to side and front to back; Any wobble indicates a potential issue requiring immediate attention – likely a loose connection. Re-tighten fasteners as needed, consulting the PDF’s diagrams for correct placement.
Pay close attention to the mounting bracket (if applicable). Ensure it’s firmly attached to both the stand and is prepared for the TV, adhering to VESA compatibility guidelines detailed in the PDF. A stable base is paramount for safety, preventing potential accidents.
Cleaning and Maintaining Your Z-Line TV Stand
Referencing the Z-Line Designs TV stand assembly instructions PDF doesn’t end with construction; it aids in long-term care. The PDF may contain material-specific cleaning recommendations, crucial for preserving the stand’s appearance. Generally, a soft, damp cloth is sufficient for most surfaces – avoid abrasive cleaners that could scratch glass or laminate finishes;
Regular dusting prevents buildup and maintains a polished look. For glass components, a glass cleaner can be used sparingly. Always test any cleaning solution in an inconspicuous area first. Inspect periodically for loose screws or bolts, tightening them as needed to maintain stability, mirroring the assembly process.
Protect the stand from direct sunlight and extreme temperatures, which can cause fading or warping. Proper maintenance, guided by the PDF, ensures your Z-Line TV stand remains a stylish and functional centerpiece for years to come.
Z-Line Designs Customer Support Contact Information
Should the Z-Line Designs TV stand assembly instructions PDF prove insufficient, direct customer support is essential. While the provided online snippets don’t detail contact information, locating it is vital when assembly challenges arise. Begin by searching the Z-Line Designs official website for a “Contact Us” or “Support” section.
Expect to find options like a phone number, email address, or a live chat feature. BrandsMart USA and Walmart.com, as retailers, may also offer support for Z-Line products, but contacting Z-Line directly ensures access to specialized expertise; Prepare your model number (e.g., ZL950260M29U for the Baltic console) and a clear description of your issue.
Having the assembly instructions PDF readily available during your contact will streamline the process. Documenting any missing parts or damaged components will also expedite resolution. Proactive communication with Z-Line Designs guarantees a smoother assembly experience.
Finding Replacement Parts for Z-Line TV Stands
Even with diligent use of the Z-Line Designs TV stand assembly instructions PDF, parts may occasionally require replacement. The initial step involves identifying the specific component needed, referencing the parts list within the PDF. Z-Line Designs’ official website is the primary source for replacement parts; navigate to a “Parts” or “Support” section.
Having your TV stand’s model number (like ZL950260M29U for the Baltic model) is crucial for accurate ordering. Retailers like BrandsMart USA and Walmart.com may not directly stock replacement parts, directing you back to Z-Line. Be prepared to provide detailed information about the damaged or missing part.
Consider searching online marketplaces, but verify the seller’s credibility. Always cross-reference part numbers with the assembly instructions PDF to ensure compatibility. Prompt replacement of faulty components maintains the stand’s integrity and safety.
Disposal and Recycling of Packaging Materials
Following assembly, responsible disposal of Z-Line Designs TV stand packaging is essential. The packaging materials, detailed within the shipping information accompanying the assembly instructions PDF, typically include cardboard, polystyrene, and plastic wrapping. Check your local municipality’s guidelines for recycling regulations; many areas offer curbside pickup for cardboard and certain plastics.
Polystyrene (foam) can be more challenging to recycle; some communities have dedicated drop-off locations or recycling events. Consider repurposing larger cardboard boxes for storage or shipping needs. Avoid simply discarding packaging in landfills whenever possible.
Break down cardboard boxes to conserve space in recycling bins. Remove any plastic tape or labels before recycling cardboard. Prioritizing environmentally conscious disposal reflects a commitment to sustainability, complementing the functionality of your new Z-Line TV stand.